How to Make a Moravian Star
Creating a Moravian Star, also known as a Herrnhut Star, is a wonderful way to bring a touch of traditional geometric beauty into your environment, especially during the holiday season.
Originating from the Moravian Church in the 19th century, these stars have become a traditional symbol of Advent and Christmas.
Below is a step-by-step guide on how to make your own Moravian Star from paper, which consists of 26 points—18 square and 8 triangular pyramids.
This project is moderately challenging, so take your time and enjoy the process.
Usage
A Moravian star artware can be used in several scenes, making it a universal and popular decoration. You can use a DIY Moravian star in multiple scenes.
Holiday Decor: Hang them from ceilings, windows, or tree branches to complement the holiday lights and ornaments.
Event Decorations: They can be used to decorate for weddings, parties, or other special events, especially for an ethereal or celestial theme. Especially, it can be used as a delicate tree topper.
Outdoor Spaces: Weather-resistant paper or protective coatings can allow these stars to be hung in covered outdoor areas like porches or gazebos.
Nursery Room: A Moravian Star can add a whimsical element to a child’s nursery, especially if you use pastel-colored paper.
Lighting Fixtures: When combined with a light source, they can be transformed into beautiful lanterns.
Gifts: A handmade Moravian Star can be thoughtful and unique, especially if you customize the colors or patterns.
Materials Needed
There are several materials you need to prepare in advance before you start to make a Moravian star yourself:
- Sturdy paper (preferably cardstock) in your desired color(s), or slightly shimmery gold cardstock
- Scissors or a craft knife
- Ruler
- Bone folder or butter knife (for scoring)
- Glue stick or quick-drying craft glue
- Printable Moravian Star template (optional)
- A hole punch or needle (for hanging, optional)
- String or fishing line (for hanging, optional)
Instruction
Preparing the Paper Pieces
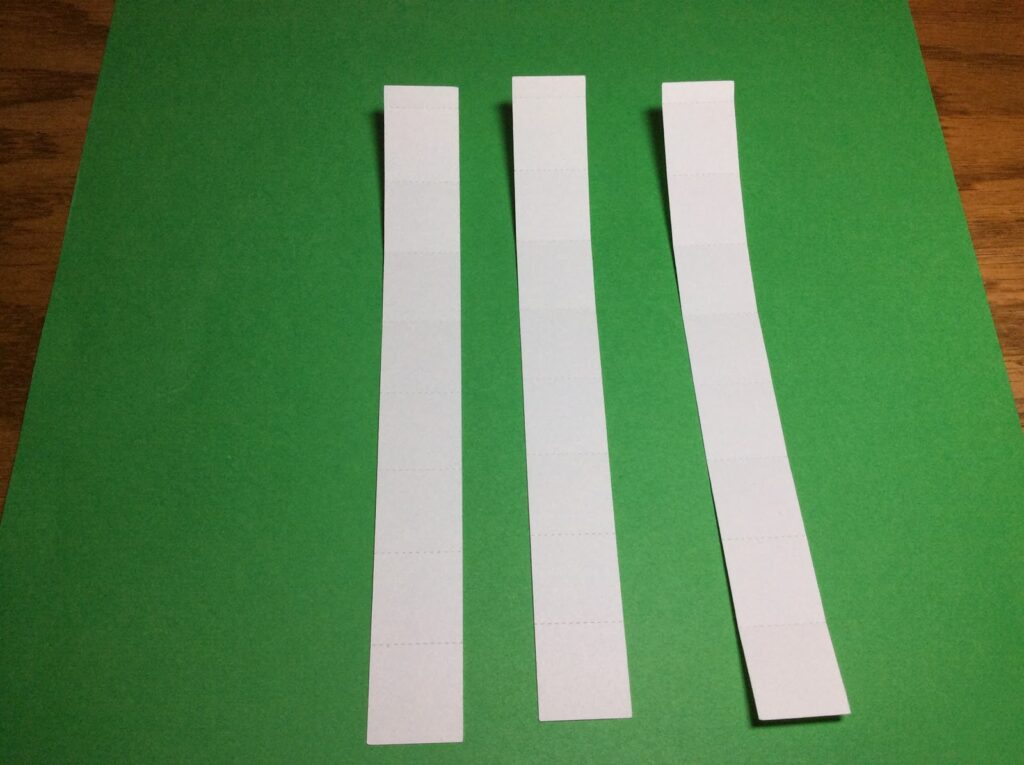
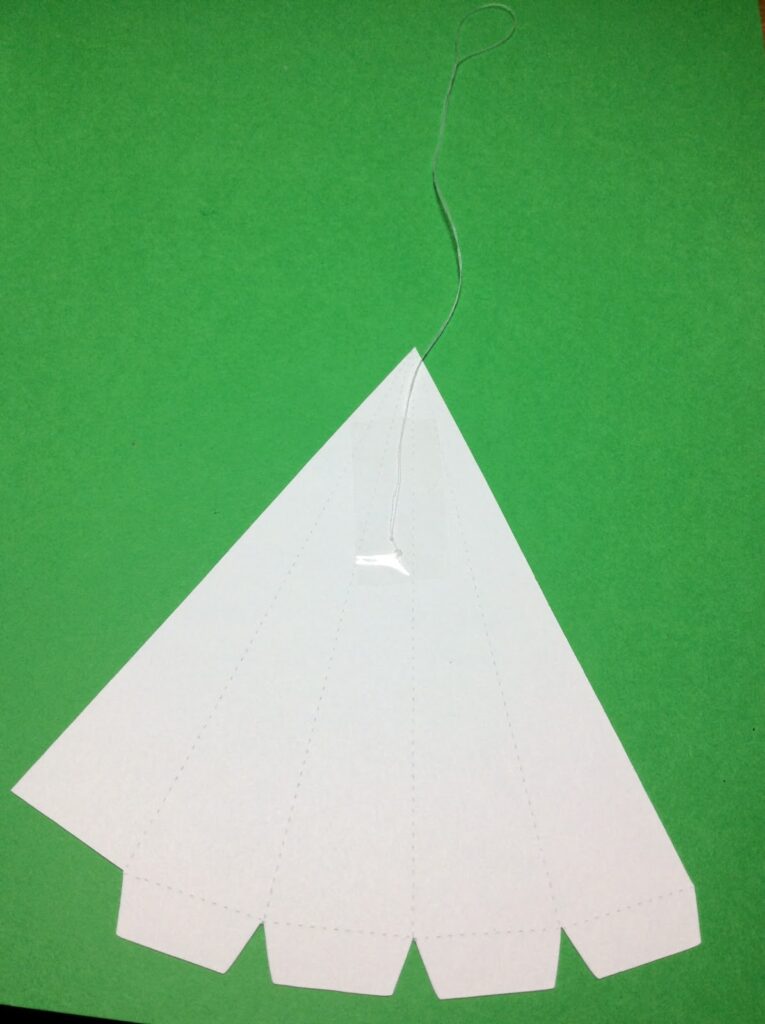
Design and Template: Begin by designing your template or finding a printable Moravian Star template online. You must create two shapes: a rhombus for the square pyramid and an elongated triangle for the triangular pyramid.
Tracing Shapes: Using your template, trace 18 rhombuses and 8 triangles from your cardstock. Make sure to be as precise as possible, as the symmetry of the pieces is crucial for the final assembly.
Scoring and Folding: Use a ruler and a bone folder to score each piece along the lines where they will be folded. This will create sharp, clean edges. Fold all scored lines to pre-crease the shapes, preparing them for easier assembly.
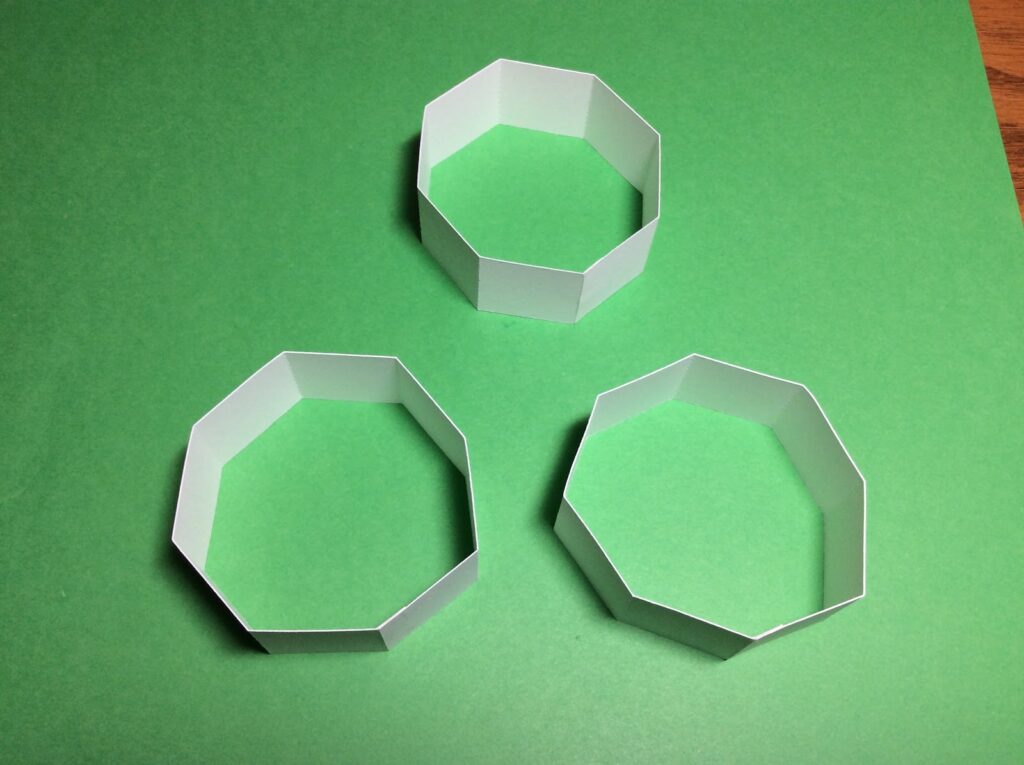
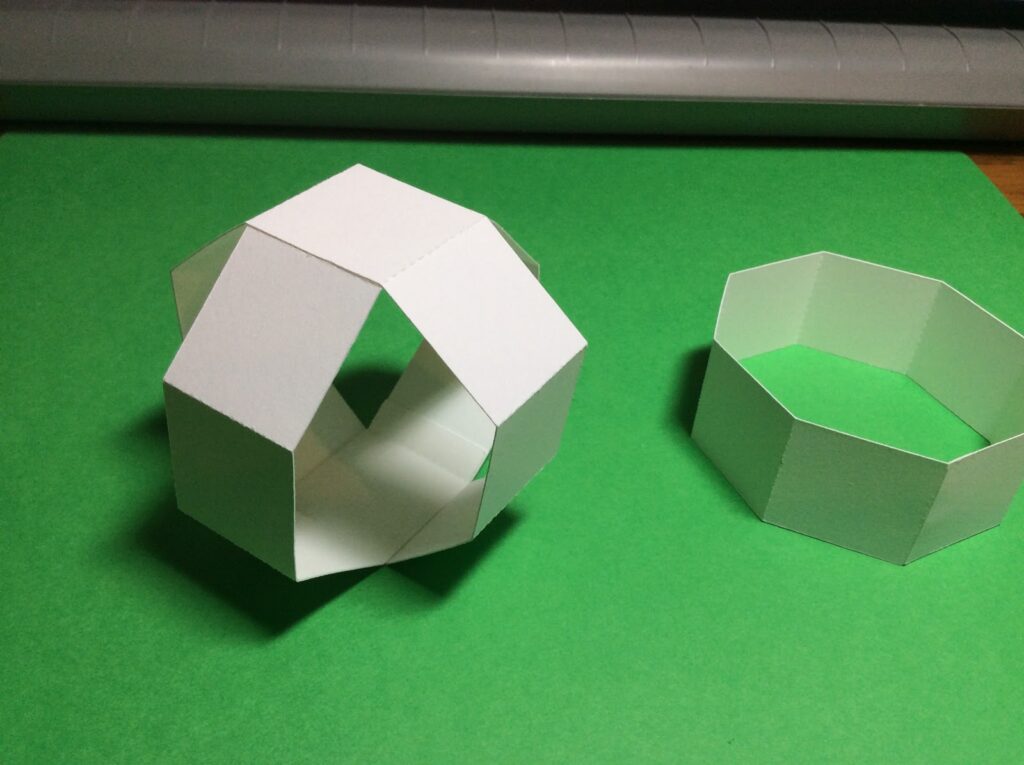
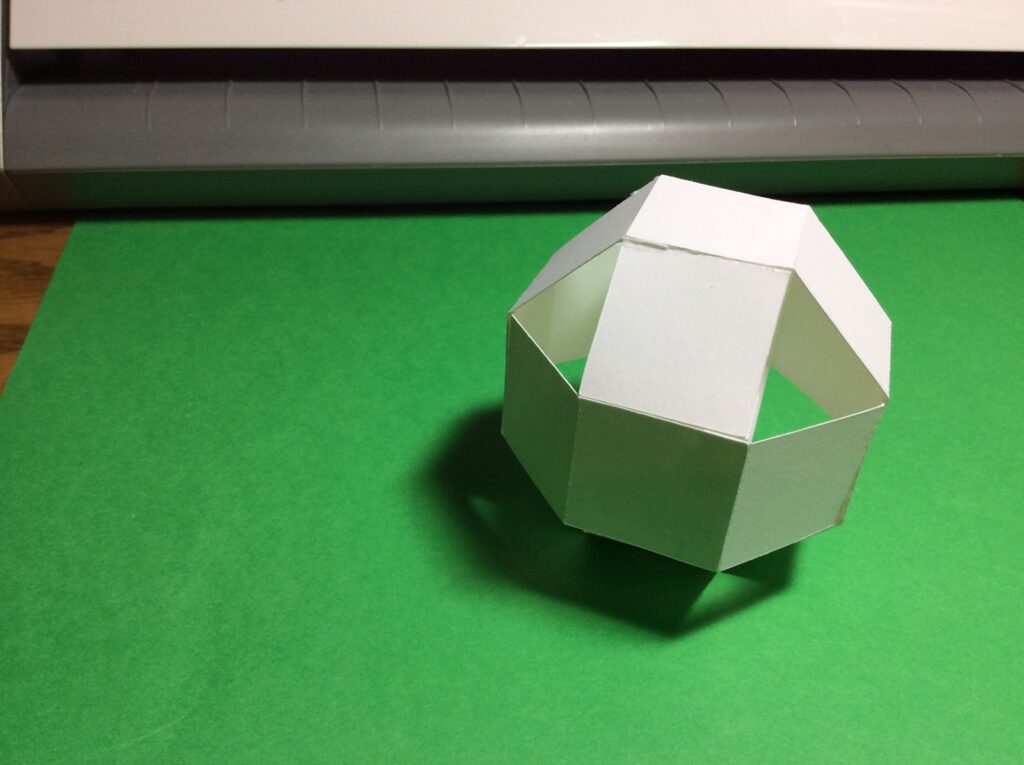
Assembling the Square Pyramid
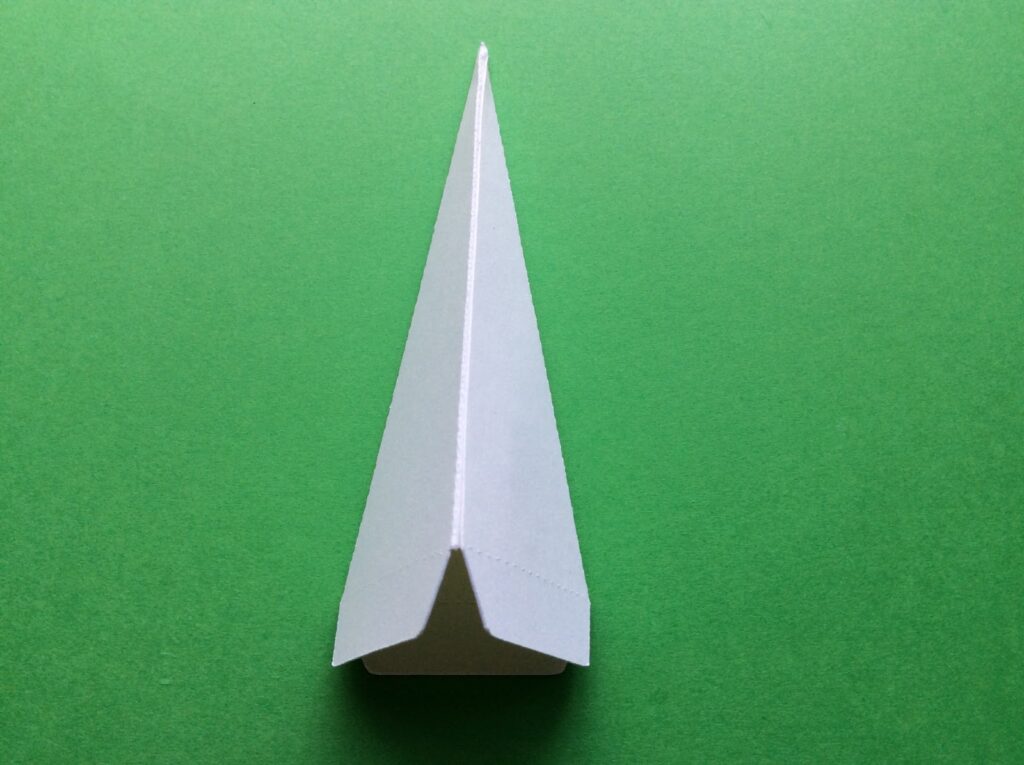
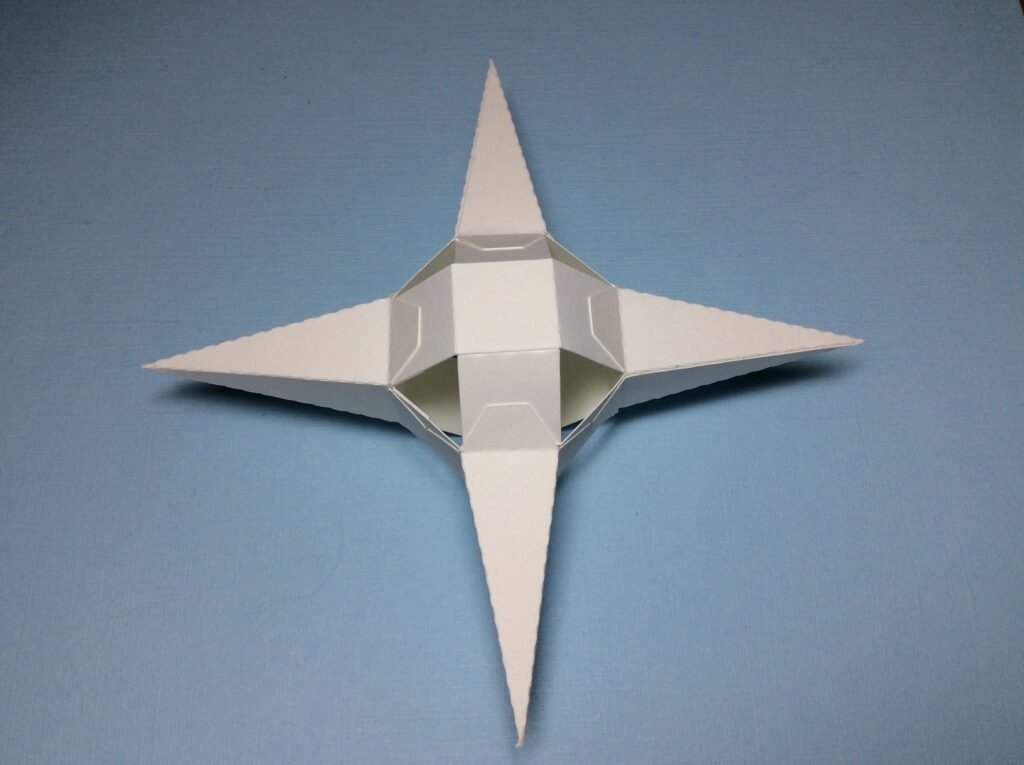
Creating Pyramids:
- Fold the rhombus into a pyramid shape for each square pyramid, ensuring the sides meet evenly.
- Glue the edges together and hold until secure.
- Repeat this for all 18 pyramids.
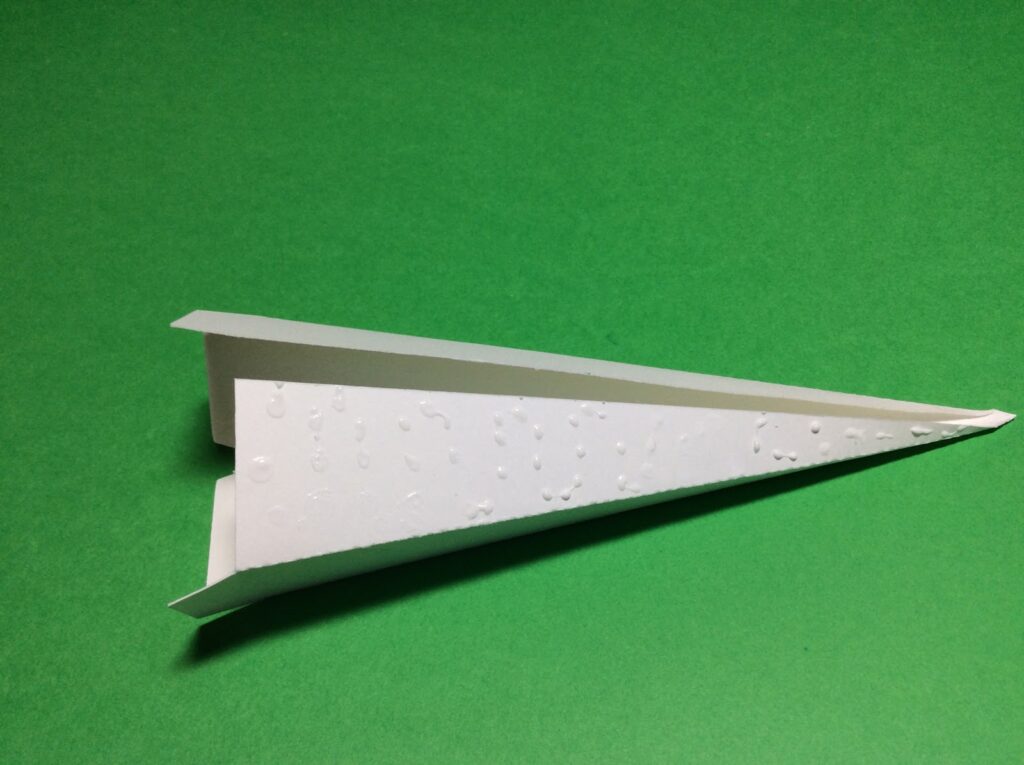
Drying Time: Allow the glue to dry completely to ensure the square points hold their shape.
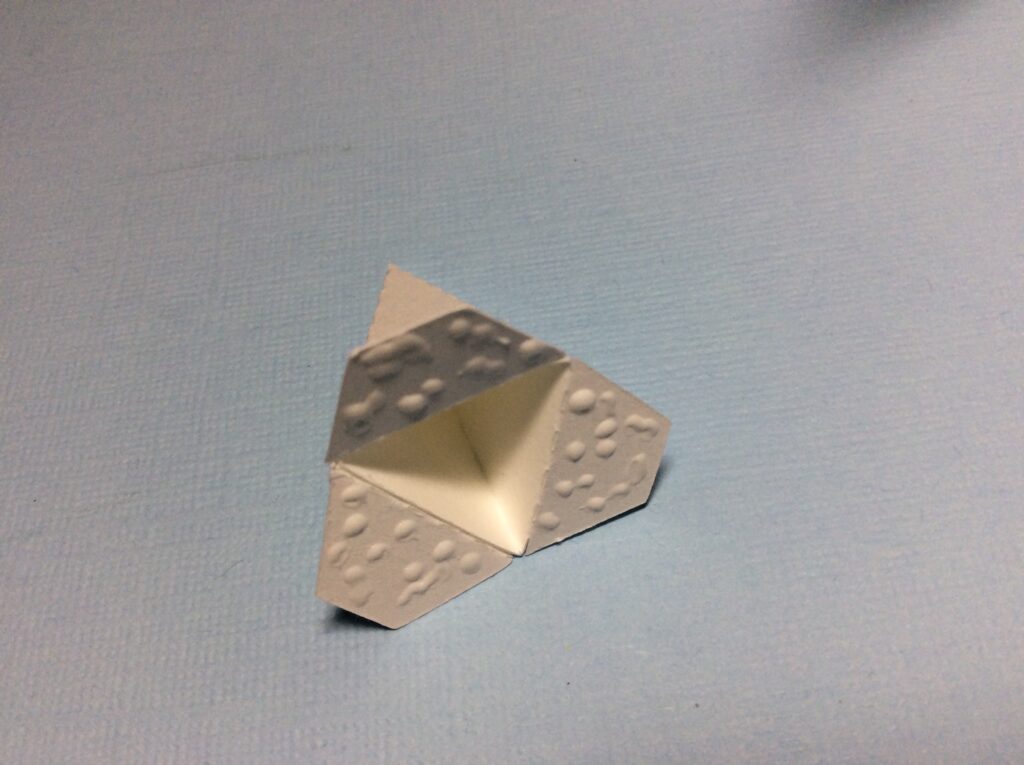
Assembling the Triangular Pyramid
Constructing Triangular Points: Repeat the same process with the triangular pieces to form 8 pyramids. Make sure the glue is dry before moving on to the next step.

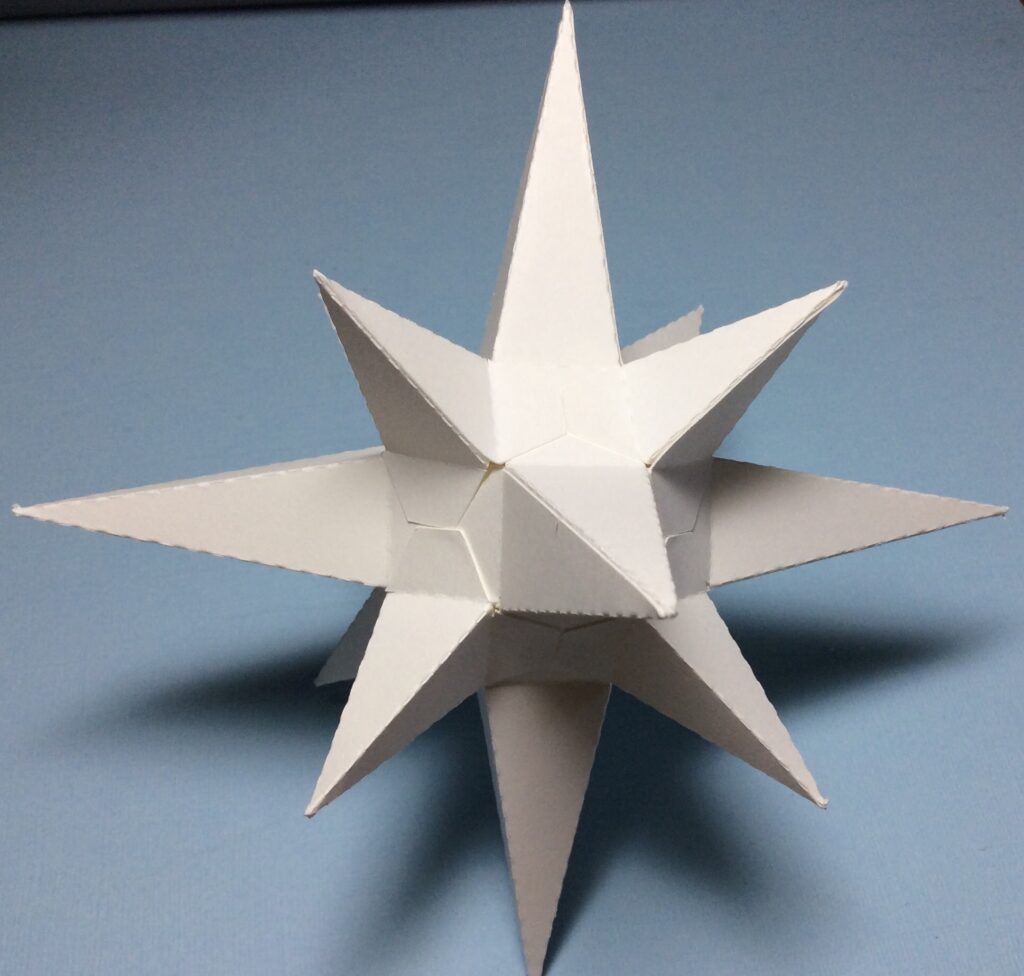
Assembling the Star
Starting the Assembly: Begin by gluing square and triangular pyramids together at their bases, alternating between the two shapes. You will begin to see the star taking shape with a combination of square and triangular points adjacent to each other.
Building Layers: Continue to add points, carefully aligning the edges and ensuring that each new matter adheres securely to the existing structure. The star will gradually grow in size as more pieces are added.
Completing the Sphere: As you near the star’s completion, the final pieces may become more challenging to insert. Patience is key. You might need to bend the pieces slightly to fit them into place, but be gentle to avoid creasing.
Final Point: The last point is often the trickiest. Apply glue to all contact surfaces, then carefully slide the end into place. You may need to hold it for an extended time to ensure a strong bond.
Inspection: Once the star is fully assembled, check for any loose points or edges needing additional glue. The entire structure must be sturdy.
Finishing Touches
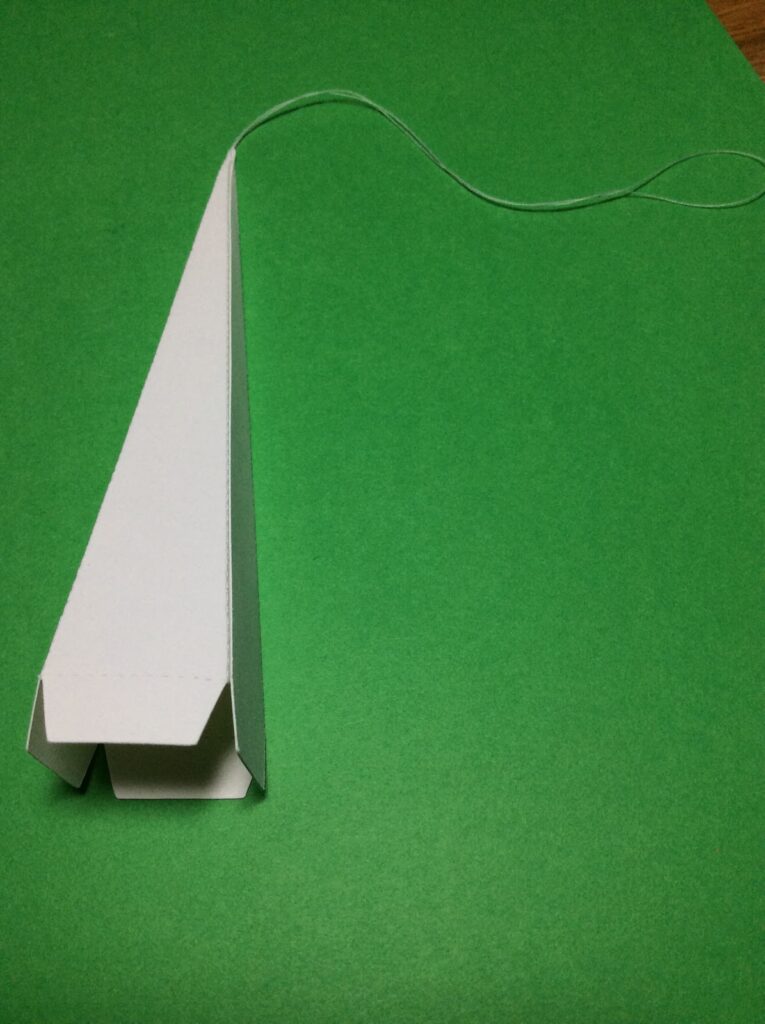
Hanging the Star: If you plan to hang your Moravian Star, use a hole punch or needle to make a small hole in one of the points. Thread a string or fishing line through the hole, secure it with a knot, and your star is ready to be displayed.
Additional Decorations: Feel free to add glitter, paint, or other decorations to personalize your Moravian Star.
Instruction 2


Tips and Tricks
Patience is Key: This project requires precision and patience, especially when working with glue and delicate paper.
Practice Makes Perfect: Consider practicing on scrap paper before using your final materials.
Work Cleanly: Keep your hands clean to avoid smudging the paper, and work on a clean surface.
Reinforce the Structure: If your star feels flimsy, you can reinforce the structure by applying clear tape at the joints from the inside.
Lighting: Some people choose to place a light inside their Moravian Star. If you wish to do this, use materials safe for lights, and never use a real flame.

Conclusion
Creating a Moravian Star is rewarding, resulting in a beautiful and intricate decor piece. With careful attention to detail and precise execution, you can craft a stunning star that captures the season’s spirit or serves as a year-round decorative piece. Remember, the first time you make one might be challenging, but the process will become more accessible and enjoyable with practice. Enjoy your crafting journey and the beautiful result of your efforts!