Easy Angel Drawing: A Step-by-Step Guide

Introduction
At Christmas, children are exposed to beautiful angel tree toppers and are attracted by angels. They possess a great sense of curiosity and energy. Alongside sharing captivating stories about angels, you can teach them to draw angel drawings.
Angels have long served as a compelling symbol in art and inspire countless creators to express their emotions and beliefs, leading to the creation of a myriad of angel figurines and paintings. Guardian angels represent protection, guidance, hope, and spiritual companionship, inspiring individuals to seek inner peace and happiness.
Numerous images of guardian angels exist, and one of the most common ones is an angel holding a loving heart. This symbolizes love and protection, embodying care, hope, and divine guardian power.
Today we will draw the guardian angel holding a heart in the picture below. Her elegance and beauty are undeniable; we are confident that children will be drawn to her charm. Of course, in addition to children, adults can also pick up a brush and draw with us!
Tools Needed for Drawing an Angel
Essential Drawing Tools
- Pencil
- Ballpoint Pen
- Eraser
- Paper
Optional Tools for Advanced Techniques
- Colored Pencils or Markers
- Watercolors or Digital Tools (like iPad and drawing software like Photoshop)
Step-by-Step Guide to Sketching the Angel’s Outline
Drawing the Basic Shapes
Step 1 Sketching the Head and Main Body

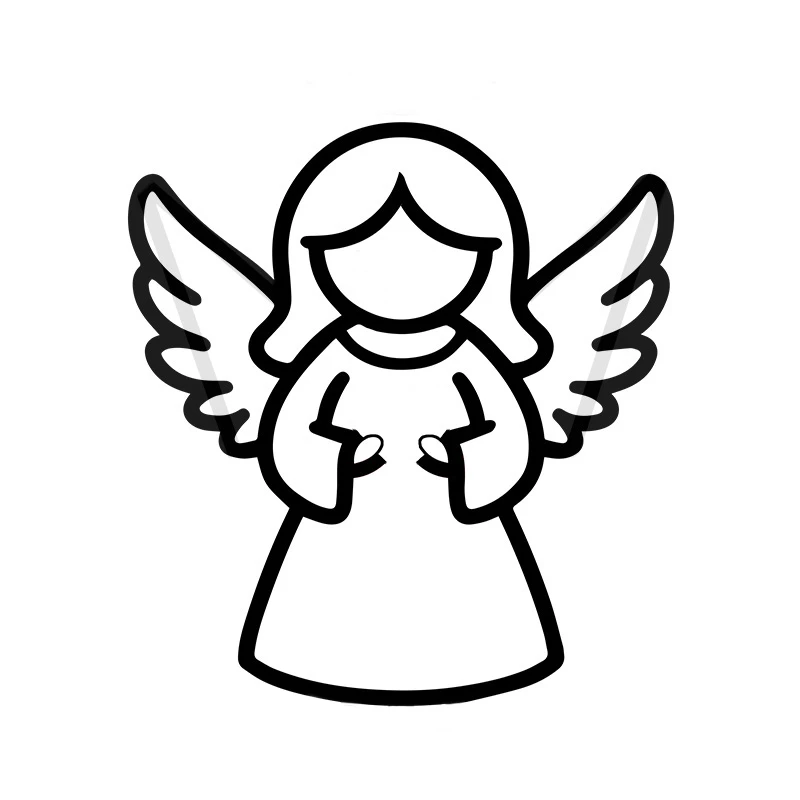
Begin by sketching a circle to represent the head. Next, create a square that makes contact with the circle. This means the torso of the angel. And then, create two elongated curved lines at both ends of the square, representing the angel’s lower body.
Step 2 Outline the Round neckline, Arms, and Hands
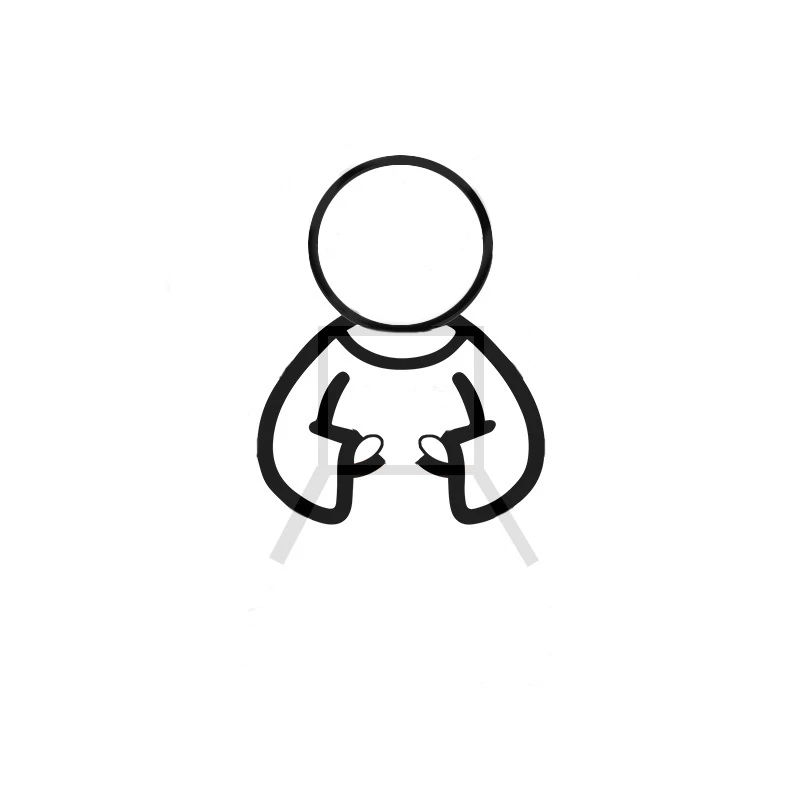
Create a big smile on the inside top of the square as a round neckline.
Next, link the circle and the square to create a rounded “L”. Begin by sketching the outer outline of the arm, followed by a small “L” shape within the square to form the inner outline of the arm. Then, join the ends of the two “L”s to form the sleeve. In this way, a left arm is drawn. Draw an opposite “L” for the right arm, adhering to the same steps as for the left arm.
At last, sketch the hands. At the top part of the left and right sleeves, use thin lines to create a flatter oval.
Step 3 Creating the Hair and Dress
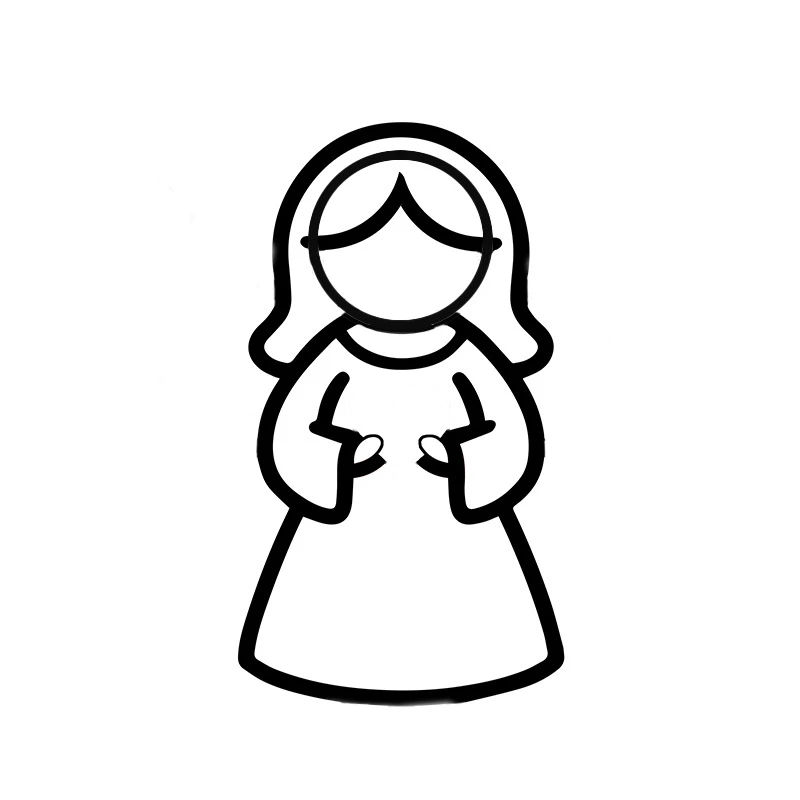
Now illustrate the angel’s hair. Not far from the head, draw a semi-oval that goes all the way to the shoulder and then broadens outward until it stops in the middle of the arm.
Following that, illustrate the bangs of the angel. Within the head, identify the midpoints of the top, left, and right, and subsequently connect them. Finally, erase the connection with the top midpoint.
After that, employ a smoother curve to link the lower body and sketch the skirt.
Step 4 Drawing the Wings
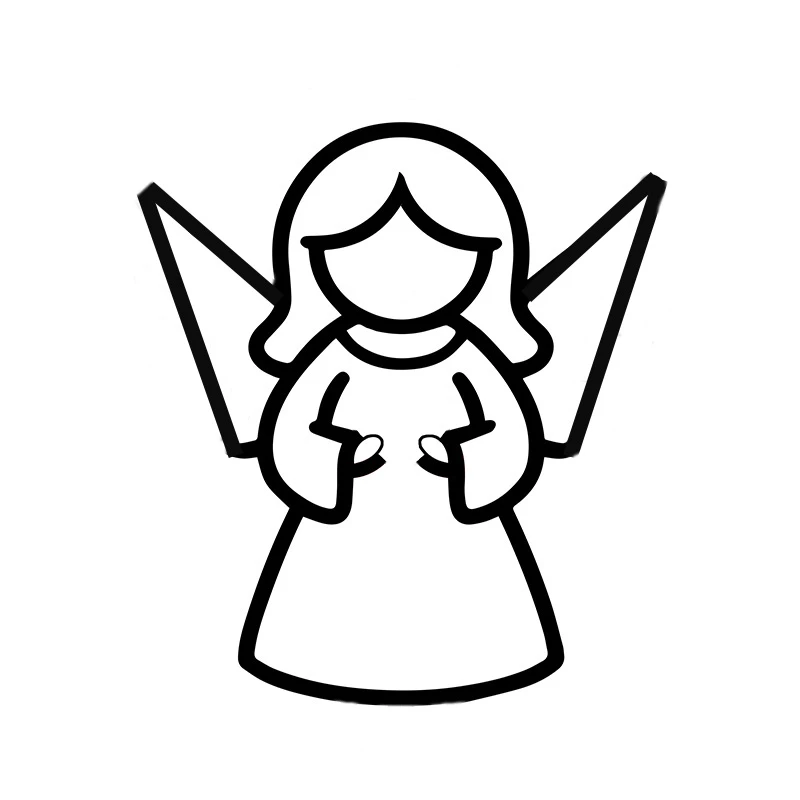
It’s time to create the wings. Starting from the bend of the angel’s hair and extending upwards to the angel’s back, sketch a basic outline of the simple butterfly’s upper wings. This helps us mark the overall position and shape of the wings.
Outline the Details
After completing the rough sketch of the angel, the next step is to improve and add details.
Step 1 Improving Angel Wings
It’s time to add the feather details to the wings of the elegant angel. After all, angels do not have the wings of butterflies.
Draw the concave and convex feathers along the upper wings of the butterfly. Note that the lines of two sides at the top are lightly curved.
Step 2 Drawing the Feet
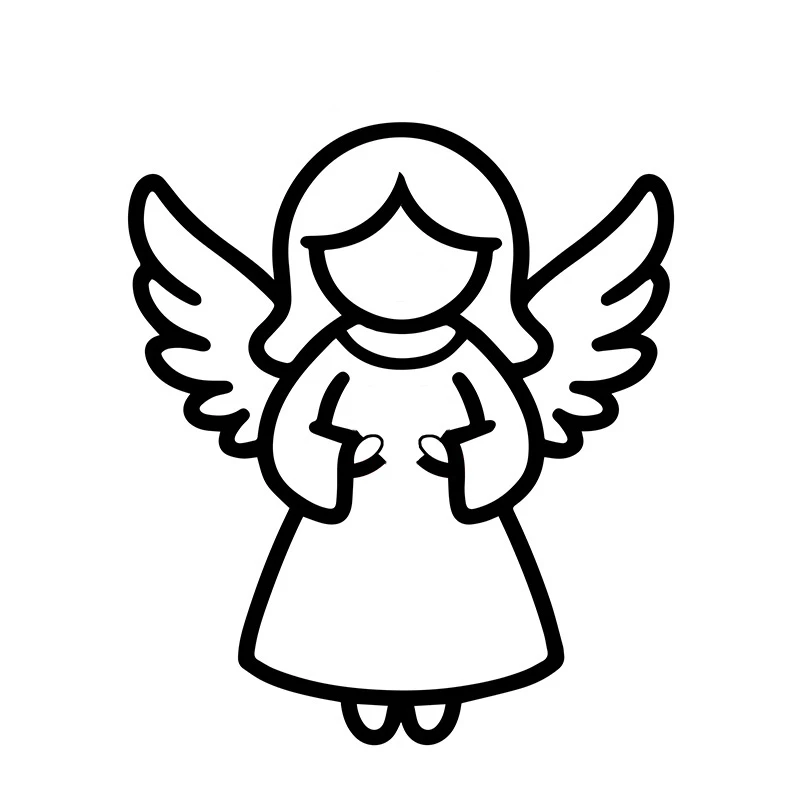
In the middle of the skirt, draw two semi-ovals opening upwards to represent the angel’s feet.
Step 3 Defining Facial Features

It’s time to make the angel more lively! Let’s add her facial features.
First, draw two “smiles” for the angel’s closed eyes, a small black dot for the nose, and finally, the real smile.
Step 4 Adding an Angel Halo
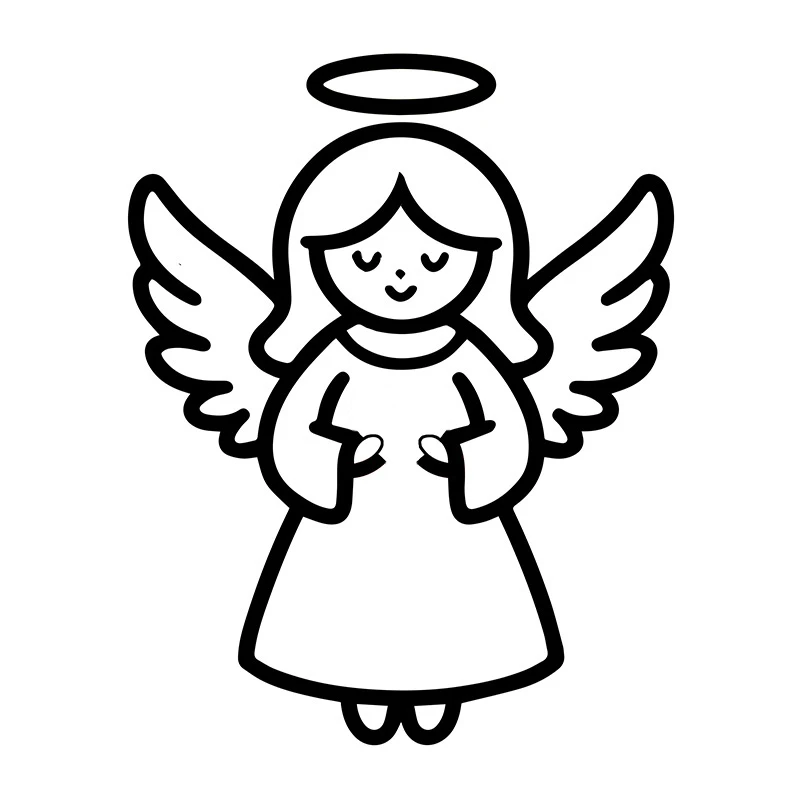
What is indispensable for an angel? Yes, a halo!
Draw a flat oval not far from the head as a halo.
Step 5 Drawing a Heart

At the junction of the sleeve and the chest, we begin by lightly sketching an oval with a fine line, and then we carefully outline it to create a heart shape. Keep in mind that the heart is positioned behind the hand, so do not cover it.
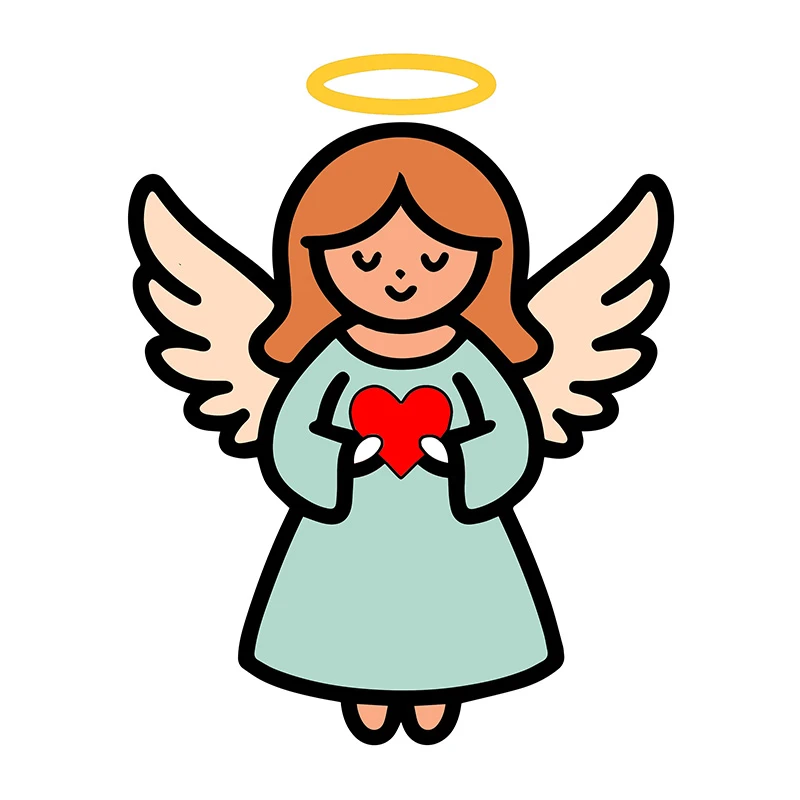
Finished Angel Drawing
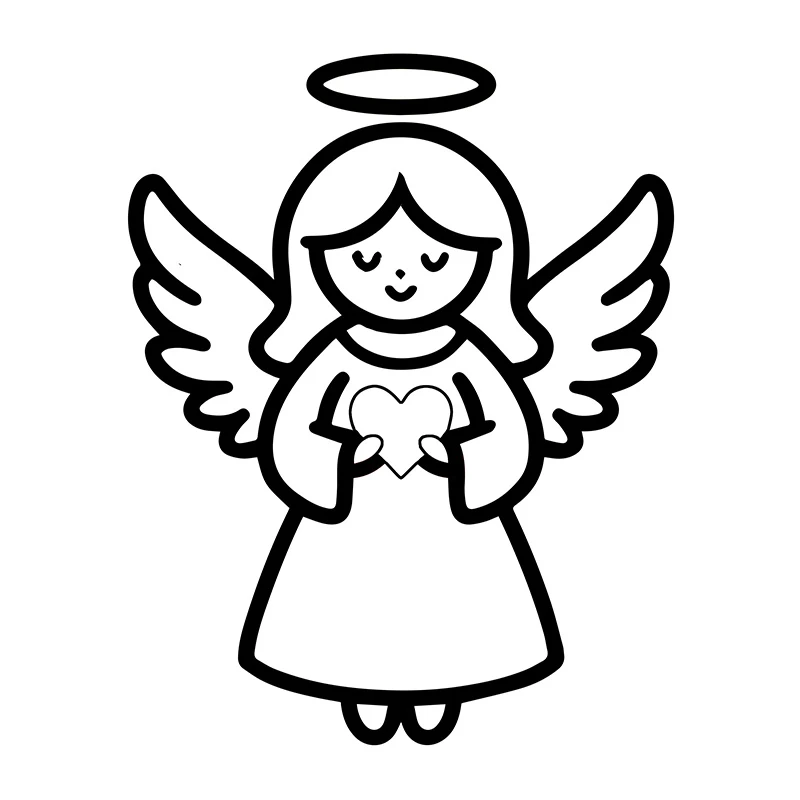
Finally, take a ballpoint pen or others and carefully draw the necessary lines and outlines. Once you’re finished, grab an eraser to remove any extra marks, and voilà—your guardian angel picture is ready to shine.
Colored Angel Drawing
If you have colored pencils or other coloring tools, you can use them to make it look richer and more beautiful.
We can color the angel’s hair brown, the wings a light hue, and the torso a soft cinnamon shade. She wears a light cyan dress, cradles a red heart in her hands, and has a golden halo.
Conclusion
Are you excited to dive into creating your very own angel painting after exploring this guide? Seize the moment to grab your painting tools and start painting!
By following our step-by-step guide, we believe you and your child will acquire valuable experience and benefits along the way.
In the process of painting, remember to enjoy every stroke, find happiness and satisfaction, and look forward to seeing you create your angel portrait!